Home » Kitchen Tips & Tricks

Category: Kitchen Tips & Tricks

  • How to Sharpen a Kitchen Knife at Home

    How to Sharpen a Kitchen Knife at Home

    A sharp knife is safer than a dull one. Dull blades need more force, slip more easily and crush food instead of slicing it. The good news: keeping your kitchen knives sharp at home is easier than it looks. This guide covers honing, sharpening and simple tools for beginners.

    Honing vs sharpening: what’s the difference?

    • Honing straightens the thin edge of the blade, which bends out of line with normal use. It doesn’t remove much metal. Use a honing rod (often called a “sharpening steel”) every few uses.
    • Sharpening grinds away a small amount of metal to create a new edge. It’s needed less often, typically when honing no longer brings the knife back.

    Choosing a sharpening tool

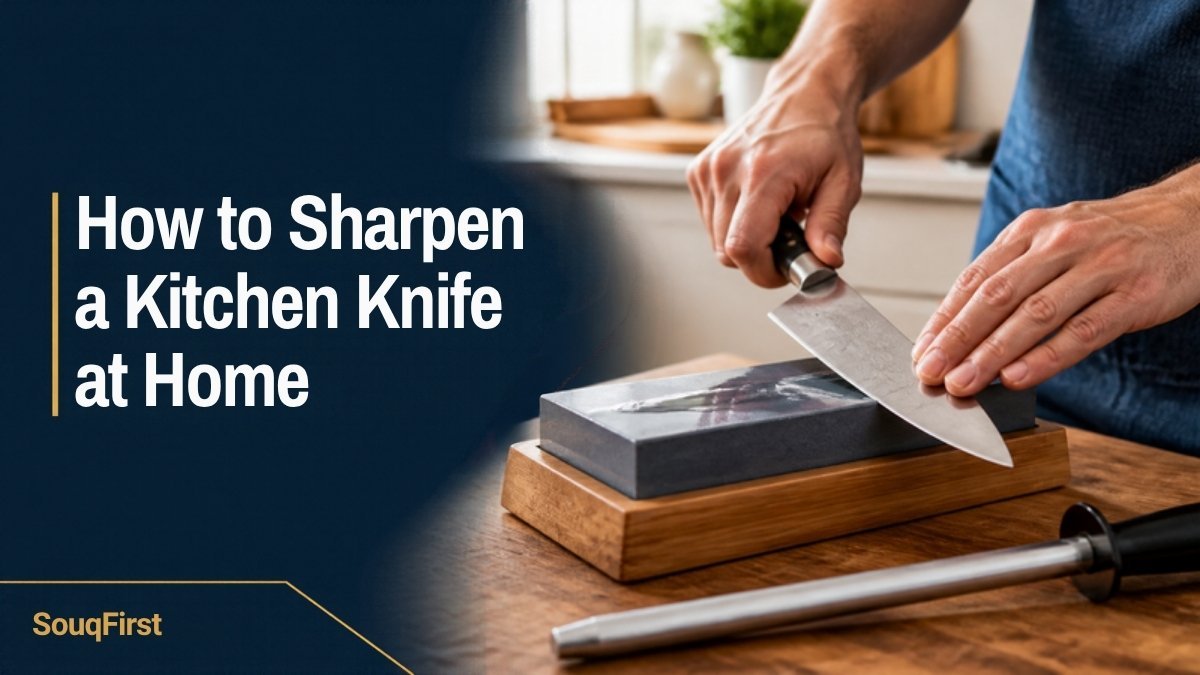
    • Whetstone (sharpening stone): gives the most control and the best edge, but takes practice. A combination stone with a medium grit (around 1000) for sharpening and a fine grit (around 3000–6000) for polishing suits most home cooks.
    • Pull-through sharpener: fast and easy for beginners. The trade-off is less control, and some models remove more metal than needed.
    • Electric sharpener: quick and consistent; follow the instructions carefully.
    • Professional sharpening service: a good option for expensive knives or if you’d rather not do it yourself.

    How to sharpen with a whetstone

    1. Prepare the stone. Many water stones need soaking for 10–15 minutes; others only need a splash of water. Follow the stone’s instructions.
    2. Place the stone on a damp towel or non-slip base so it doesn’t move.
    3. Find the angle. Western-style knives are often sharpened at about 20 degrees per side; many Japanese-style knives are sharpened closer to 15 degrees. Check your knife maker’s recommendation.
    4. Sharpen one side. With light, even pressure, slide the blade across the stone from heel to tip, as if slicing a thin layer off the stone. Repeat 10–15 times.
    5. Feel for a burr. A tiny rough lip forms on the opposite side when that side is sharp. Run your fingertip gently across (not along) the edge to feel it.
    6. Sharpen the other side the same number of strokes.
    7. Polish on the fine side of the stone with lighter strokes on both sides.
    8. Rinse and dry the knife and stone.

    How to use a honing rod

    Hold the rod vertically with the tip on a towel. Place the heel of the blade against the top of the rod at roughly the same angle you sharpen at, then draw the knife down and toward you so the whole edge touches the rod. Alternate sides for 5–8 strokes each.

    How to tell if your knife is sharp

    Try slicing a sheet of paper held in the air. A sharp knife cuts cleanly; a dull one tears or snags. A ripe tomato is another good test: the blade should break the skin without pressing.

    Safety tips

    • Always move slowly and keep your fingers away from the edge.
    • Never test sharpness by running a finger along the blade.
    • Don’t sharpen serrated bread knives on a flat stone; they need a special tapered tool or a professional service.
    • Store knives in a block, on a magnetic strip or with blade guards.

    Frequently asked questions

    How often should I sharpen my kitchen knives?

    Hone every few uses and sharpen when honing stops helping; for many home cooks that is a few times a year.

    Is a pull-through sharpener bad for knives?

    It’s convenient and fine for everyday knives, but it offers less control and may remove more metal than a stone.

    What angle should I sharpen a kitchen knife?

    Often about 20 degrees per side for Western knives and about 15 degrees for many Japanese knives. Follow your knife maker’s guidance.

    The bottom line

    Hone often, sharpen occasionally, and keep a steady angle. With a little practice on a whetstone, or the convenience of a pull-through sharpener, your knives will stay sharp and safer to use.

    New to knives? Read How to Choose a Chef’s Knife and browse Kitchen Accessories.

    Related articles

  • How to Organize Your Refrigerator (Shelf by Shelf)

    How to Organize Your Refrigerator (Shelf by Shelf)

    A well-organized refrigerator does more than look nice. It keeps food safer, helps produce last longer, and makes it easy to see what you have before you shop. Different parts of a fridge are slightly different temperatures, so where you store food actually matters. Here is a simple shelf-by-shelf plan.

    Start with the right temperature

    The U.S. Food and Drug Administration recommends keeping your refrigerator at 40°F or below and your freezer at 0°F. An inexpensive appliance thermometer is the easiest way to check, because many built-in dials don’t show an exact temperature.

    Step 1: Empty, clean and check dates

    Take everything out, throw away expired or spoiled food, and wipe the shelves and drawers with warm, soapy water. Dry them before putting food back.

    Step 2: Know your zones

    Upper shelves: ready-to-eat foods

    Leftovers, drinks, deli items, yogurt and other foods that don’t need cooking. Keep leftovers at eye level so they get eaten.

    Lower shelves: raw meat, poultry and seafood

    Store raw meat on the bottom shelf, in a container or on a tray. If it leaks, juices can’t drip onto ready-to-eat foods below it. This is one of the most important food safety habits.

    Middle shelves: dairy and eggs

    Milk and eggs do best on an inside shelf, where the temperature is steadier than in the door.

    Crisper drawers: produce

    If your drawers have humidity controls, use a high-humidity drawer for leafy greens and vegetables that wilt, and a low-humidity drawer for fruits like apples and pears. Keeping apples away from greens also helps, because apples release ethylene gas that speeds up ripening. See how to store fruits and vegetables for more.

    Door: condiments and drinks

    The door is the warmest part of the fridge. Use it for condiments, sauces, juice and water, not milk or eggs.

    Step 3: Use clear bins and labels

    • Clear bins group small items like cheese, snacks or sauces so nothing gets lost in the back.
    • A “use first” bin for food that needs to be eaten soon helps reduce waste.
    • Turntables make it easy to reach jars in the corners.
    • Labels with dates on leftovers remove the guesswork.
    • Don’t overpack shelves; cold air needs room to circulate.

    Step 4: Keep it organized

    • First in, first out: when you unpack groceries, move older items to the front.
    • Do a quick 5-minute check before shopping so you know what you already have.
    • Wipe spills right away, especially under raw meat.
    • Eat or freeze leftovers within 3 to 4 days, following USDA guidance.

    Frequently asked questions

    Where should raw meat go in the fridge?

    On the bottom shelf, in a container or tray, so juices can’t drip onto other foods.

    Should eggs go in the fridge door?

    It’s better to keep eggs on an inside shelf, where the temperature is colder and more stable.

    What temperature should my refrigerator be?

    40°F or below, according to the FDA. The freezer should be at 0°F.

    The bottom line

    Set the right temperature, store raw meat at the bottom, keep ready-to-eat foods on top, use the drawers for produce, and save the door for condiments. Add a few clear bins and your fridge will stay organized with very little effort.

    Find clear bins and containers in our Storage & Organization collection.

    Related articles

  • How to Season a Cast Iron Skillet (Step-by-Step)

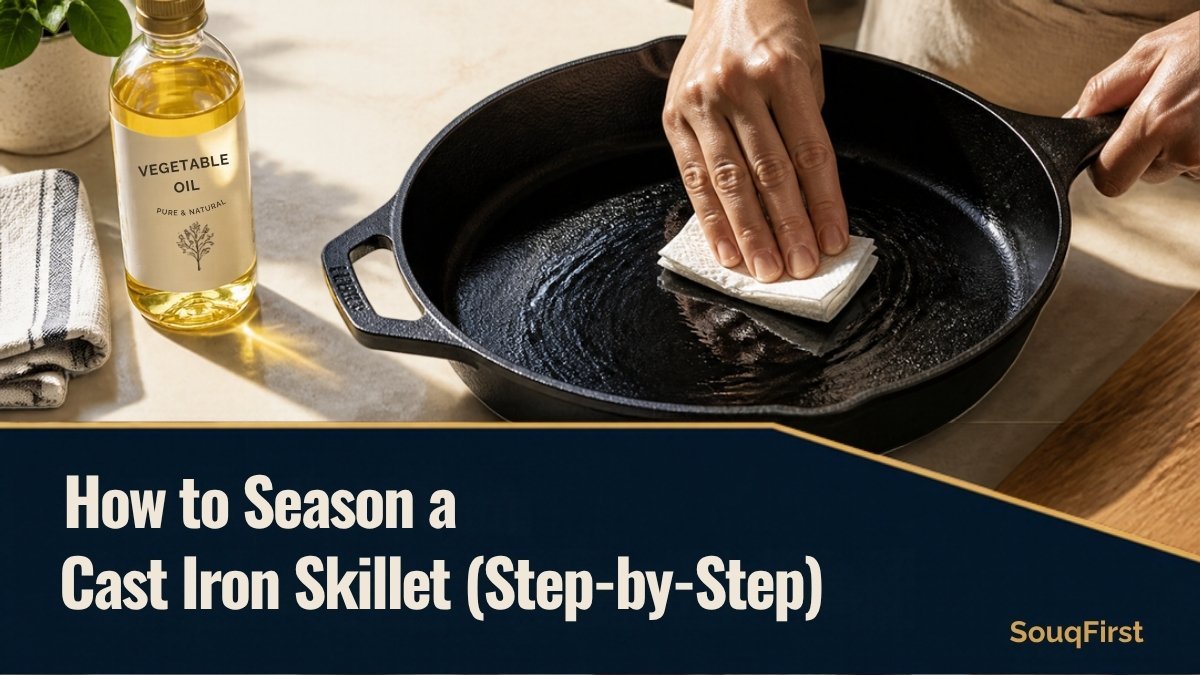
    How to Season a Cast Iron Skillet (Step-by-Step)

    Seasoning is what makes cast iron special. It’s a thin layer of oil baked onto the metal until it hardens into a smooth, dark coating. Good seasoning helps food release, protects the pan from rust, and gets better the more you cook. Here is how to season a skillet from scratch or restore one that has lost its finish.

    When do you need to season cast iron?

    • When you buy a bare or unseasoned pan
    • After removing rust
    • When food starts sticking or the surface looks dull, patchy or gray
    • Many new pans come pre-seasoned from the factory; extra coats can still help build a stronger finish

    What you need

    • Your cast iron skillet
    • Dish soap, a stiff brush and a towel
    • A neutral cooking oil with a high smoke point, such as vegetable oil, canola oil or shortening
    • Paper towels or a lint-free cloth
    • An oven and a sheet pan or foil

    Step-by-step: how to season a cast iron skillet

    1. Clean the pan. Wash it with warm, soapy water and scrub away any food or rust. This is the one time a thorough soap scrub is fine.
    2. Dry it completely. Towel-dry, then place it on a burner over low heat for a few minutes until all moisture is gone.
    3. Apply a very thin layer of oil. Rub a small amount of oil over every surface: inside, outside and the handle.
    4. Wipe off the excess. This is the most important step. Wipe the pan with a clean paper towel as if you made a mistake and want to remove all the oil. The pan should look almost dry. Too much oil leaves a sticky finish.
    5. Bake it upside down. Place the skillet upside down on the middle oven rack, with a sheet pan or foil on the rack below to catch drips. Bake at the temperature your pan’s manufacturer recommends; many suggest roughly 450 to 500°F, for about one hour.
    6. Let it cool in the oven. Turn off the oven and let the pan cool inside.
    7. Repeat for a stronger finish. Two to three rounds of oil, wipe and bake build a durable, even layer.

    How to keep seasoning strong

    • Cook with oil or fat, especially in the first few weeks.
    • Clean the pan soon after cooking, dry it fully and wipe on a few drops of oil. See our guide on how to clean a cast iron skillet.
    • Avoid soaking and the dishwasher.
    • Searing, frying and roasting help build seasoning; long-simmered acidic sauces can wear it down.

    Troubleshooting

    The pan is sticky

    Too much oil was left on. Bake it again upside down for another hour to finish curing the layer, and use less oil next time.

    The seasoning is flaking

    Flakes usually mean thick layers that didn’t bond well. Scrub off the loose bits, then re-season with thin coats.

    There are rust spots

    Scrub the rust off down to bare metal, wash, dry and re-season the whole pan.

    Frequently asked questions

    What is the best oil to season cast iron?

    A neutral oil with a high smoke point, such as vegetable oil, canola oil or shortening, works well and is easy to find. Follow your pan’s care instructions if the manufacturer recommends a specific product.

    How often should I season cast iron?

    A full oven seasoning is only needed occasionally. Regular cooking with oil and a quick oil wipe after cleaning keep the finish in good shape.

    Can I season cast iron on the stovetop?

    Yes, for maintenance. Heat the clean, dry pan, wipe on a thin layer of oil, and heat until it just starts to smoke. The oven method gives a more even coat for a full re-season.

    The bottom line

    Thin coats, wiped almost dry, baked hot and repeated: that is the whole secret of seasoning cast iron. Do it once properly, then let everyday cooking do the rest.

    Browse our Cookware & Bakeware collection.

    Related articles

  • Thanksgiving Kitchen Prep Checklist: What to Do and When

    Thanksgiving Kitchen Prep Checklist: What to Do and When

    Thanksgiving is the biggest cooking day of the year for many American homes. The secret to a calm holiday is not cooking faster; it’s starting earlier. This checklist breaks the work into small steps over two weeks, so the big day is mostly reheating, roasting and enjoying.

    Two weeks before

    • Confirm your guest count and ask about allergies and dietary needs.
    • Plan the menu, then write a shopping list split into “buy now” (pantry items, drinks, frozen turkey) and “buy fresh” (produce, dairy, bread).
    • Check your equipment: a roasting pan large enough for the turkey, a meat thermometer, enough baking dishes, serving pieces and food storage containers.
    • Clean out the fridge and freezer to make room. See our guide on how to organize your refrigerator.
    • Buy the turkey if it’s frozen. A common planning guideline is about 1 to 1.5 pounds per person.

    One week before

    • Buy non-perishable groceries and drinks.
    • Make and freeze anything that freezes well, such as pie dough, rolls or stock.
    • Plan your oven schedule: write down what goes in the oven, at what temperature, and for how long. Oven space is the most common Thanksgiving bottleneck.
    • Decide what can be cooked on the stovetop, in a slow cooker or in an air fryer to free up the oven.

    Start thawing the turkey (timing matters)

    According to USDA guidance, the safest way to thaw a turkey is in the refrigerator, allowing about 24 hours for every 4 to 5 pounds. That means a 16-pound turkey needs about four days. Keep it in its wrapping on a tray on the bottom shelf to catch drips. Never thaw a turkey on the counter.

    Two to three days before

    • Buy fresh produce, dairy and bread.
    • Chop sturdy vegetables like onions, celery and carrots and store them in containers.
    • Make cranberry sauce; it keeps well in the fridge.
    • Bake pies, or prepare fillings so they’re ready to bake.

    The day before

    • Assemble casseroles and side dishes, cover them and refrigerate.
    • Set the table and lay out serving dishes with labels for what goes in each.
    • Empty the dishwasher and take out the trash.
    • Chill drinks and make extra ice.

    Thanksgiving Day

    1. Take the turkey out of the fridge and prepare it for roasting following your recipe.
    2. Roast the turkey, and check doneness with a food thermometer. USDA guidance says turkey is safe at 165°F, measured in the thickest part of the breast, the innermost part of the thigh and the innermost part of the wing.
    3. Let the turkey rest before carving. This frees the oven for side dishes and rolls.
    4. Reheat make-ahead dishes while the turkey rests.
    5. Make gravy on the stovetop using the pan drippings.

    After the meal: food safety

    • Refrigerate leftovers within 2 hours of cooking, as USDA recommends.
    • Carve leftover turkey off the bone and store it in shallow containers so it cools quickly.
    • Eat refrigerated leftovers within 3 to 4 days, or freeze them for longer storage.

    Frequently asked questions

    How long does it take to thaw a turkey in the fridge?

    USDA guidance is about 24 hours for every 4 to 5 pounds of turkey.

    What temperature should turkey be cooked to?

    165°F, checked with a food thermometer in the thickest part of the breast, the innermost thigh and the innermost wing.

    What can I make ahead for Thanksgiving?

    Cranberry sauce, pie dough, pies, chopped vegetables, stock and many casseroles can be made one to three days ahead.

    The bottom line

    Start two weeks out, thaw the turkey in the fridge on time, cook what you can ahead, and plan your oven schedule. That turns Thanksgiving Day into a relaxed finish rather than a race.

    Need serving pieces or storage containers? Browse Dining & Tableware and Storage & Organization.

    Related articles

  • How to Store Fruits and Vegetables So They Last Longer

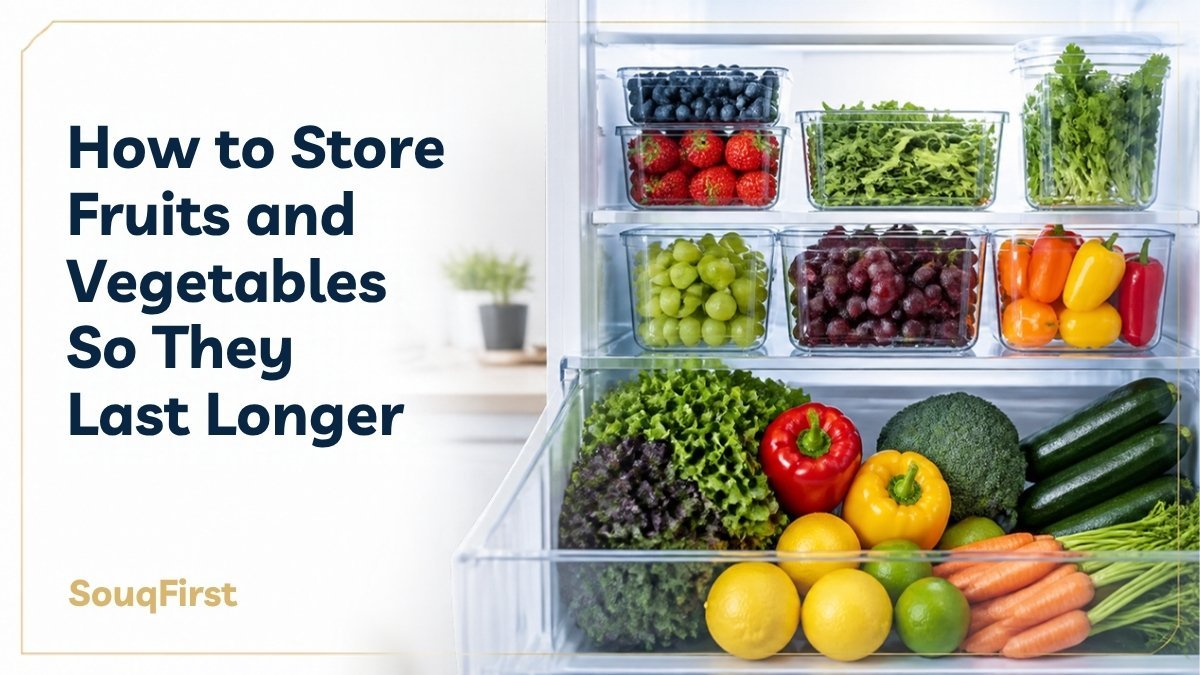
    How to Store Fruits and Vegetables So They Last Longer

    Few things are more frustrating than throwing away wilted lettuce or moldy berries a few days after shopping. Storing produce the right way helps it last longer, saves money and cuts food waste. The rules are simple once you know them.

    The three big rules

    1. Know what belongs in the fridge and what does not. Some produce loses flavor or texture in the cold.
    2. Keep ethylene producers away from sensitive produce. Some fruits release a natural gas called ethylene that speeds up ripening in nearby produce.
    3. Control moisture. Too much moisture leads to mold; too little leads to wilting.

    Store in the refrigerator

    • Leafy greens: Wrap in a dry paper towel and store in a container or bag in the crisper drawer.
    • Berries: Keep them dry and unwashed until you are ready to eat them. Remove any moldy berries right away.
    • Broccoli, cauliflower, carrots, celery and peppers: Store in the crisper drawer. Cut carrots and celery stay crisp in a container of water in the fridge; change the water every few days.
    • Grapes, cherries and citrus: Refrigerate to keep them fresh longer.
    • Mushrooms: Keep them in a paper bag rather than sealed plastic, which traps moisture.
    • Corn and green beans: Refrigerate and use within a few days for the best flavor.

    Store on the counter

    • Tomatoes: Keep them on the counter for the best flavor, stem side down, until ripe.
    • Bananas: Store at room temperature. Once ripe, they can go in the fridge; the peel darkens but the fruit stays fine.
    • Avocados, peaches, plums, pears and mangoes: Ripen on the counter, then refrigerate once ripe to slow further ripening.
    • Whole melons: Keep on the counter until cut, then refrigerate the cut fruit in a covered container.

    Store in a cool, dark, dry place

    • Potatoes and sweet potatoes: Keep in a cool, dark, well-ventilated spot, such as a pantry, not the fridge.
    • Onions and garlic: Store in a cool, dry place with good airflow. Keep onions away from potatoes, because together they can spoil faster.
    • Winter squash: Keeps for weeks in a cool, dry place.

    Know your ethylene producers

    Apples, bananas, avocados, tomatoes, peaches, pears and cantaloupe release ethylene. Store them apart from ethylene-sensitive produce such as leafy greens, broccoli, cucumbers and berries. You can also use this to your advantage: put an unripe avocado in a paper bag with a banana to ripen it faster.

    Fresh herbs

    • Soft herbs like cilantro, parsley and basil: trim the stems and stand them in a jar of water like flowers. Keep basil on the counter and cover parsley and cilantro loosely with a bag in the fridge.
    • Hardy herbs like rosemary and thyme: wrap in a slightly damp paper towel and refrigerate.

    Smart storage habits

    • Wash produce just before eating, not before storing, unless you dry it thoroughly.
    • Use clear containers so you can see what needs to be eaten first.
    • First in, first out: move older produce to the front when you unpack groceries.
    • Check your fridge temperature. Food safety guidance recommends keeping the refrigerator at 40°F or below.

    Frequently asked questions

    Should apples go in the fridge?

    Apples last much longer in the fridge than on the counter. Keep them away from leafy greens because they release ethylene.

    Why do my berries get moldy so fast?

    Moisture is usually the cause. Don’t wash them until you eat them, store them dry, and remove any moldy berries right away.

    Can I store onions and potatoes together?

    It’s best not to. They can cause each other to spoil faster.

    The bottom line

    Refrigerate greens and berries, keep tomatoes and bananas on the counter, store potatoes and onions in a cool dark place, and keep ethylene producers apart. These small habits make your groceries last noticeably longer.

    Clear containers make this easier. See our Storage & Organization collection.

    Related articles

  • How to Clean a Cast Iron Skillet Without Ruining It

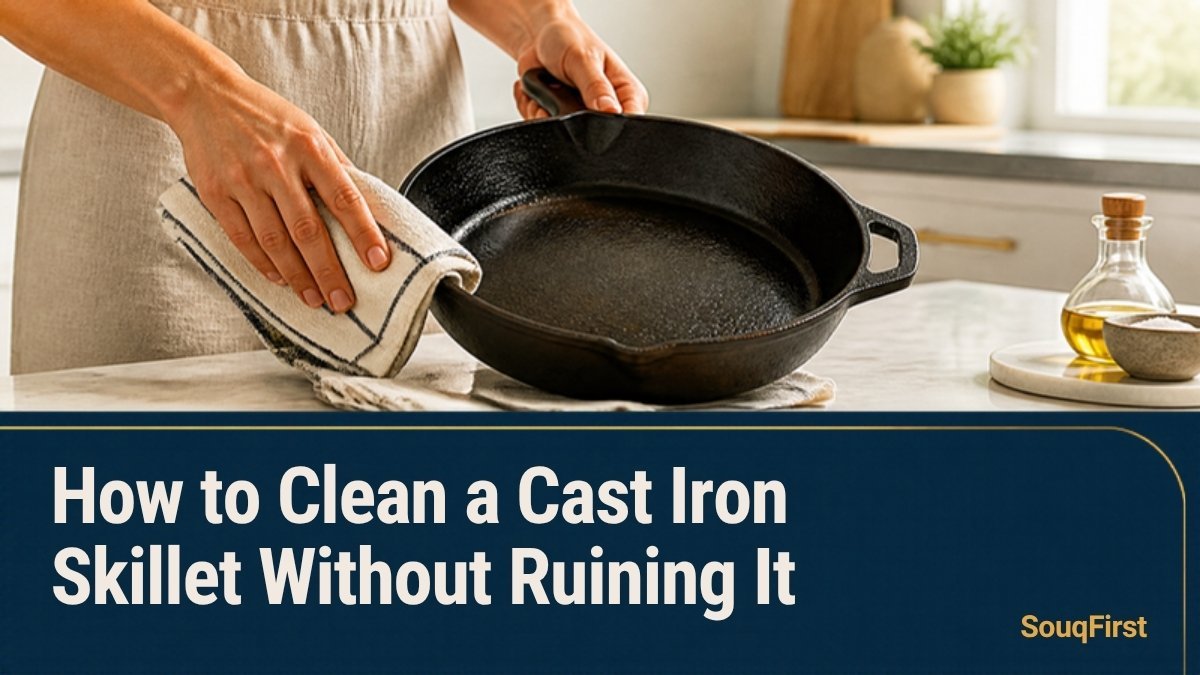
    How to Clean a Cast Iron Skillet Without Ruining It

    A cast iron skillet can last for generations, but only if you clean it the right way. The good news is that it takes less than five minutes, and you probably already have everything you need. This guide walks you through everyday cleaning, stuck-on food, rust, and the few habits that quietly damage cast iron.

    Why cast iron needs different care

    Cast iron is protected by a layer called seasoning. Seasoning is oil that has been heated until it bonds to the metal and forms a slick, dark coating. That coating gives the pan its natural nonstick surface and keeps it from rusting.

    Your goal when cleaning is simple: remove the food, keep the seasoning, and get the pan completely dry.

    What you need

    • Hot water
    • A stiff brush, non-scratch scrubber, or pan scraper
    • Coarse kosher salt (for stubborn bits)
    • A small amount of dish soap (optional)
    • A clean towel or paper towels
    • A neutral cooking oil, such as vegetable, canola or shortening

    How to clean a cast iron skillet after every use

    1. Clean it while it is still warm. Food comes off far more easily before it cools and hardens. Let the pan cool enough to handle safely.
    2. Rinse with hot water. Scrub with a brush or scraper to lift food residue.
    3. Use a little soap if needed. A small drop of mild dish soap will not strip well-built seasoning. What damages seasoning is long soaking and harsh scrubbing, not a quick wash.
    4. Dry it immediately and completely. Wipe it with a towel, then set it on a burner over low heat for a minute or two to drive off any remaining moisture.
    5. Add a very thin coat of oil. While the pan is warm, rub in a few drops of oil with a paper towel, then wipe off the excess. The pan should look dark and satin, not greasy or sticky.

    How to remove stuck-on food

    If food is really stuck, pour a tablespoon or two of coarse kosher salt into the pan with a splash of water and scrub with a folded paper towel or brush. The salt works like a gentle abrasive. For very stubborn spots, add about half an inch of water, bring it to a simmer for a few minutes, then scrape once it has softened.

    How to remove rust from cast iron

    A little rust is common and usually easy to fix.

    1. Scrub the rusty area with steel wool or a stiff scrubber until you reach bare, clean metal.
    2. Wash, rinse and dry the pan completely.
    3. Rub a thin layer of oil over the whole pan, inside and out, and wipe off the excess.
    4. Bake it upside down in the oven according to the manufacturer’s re-seasoning instructions, with foil or a sheet pan on the rack below to catch drips. Many brands suggest a temperature in the range of 350 to 500°F for about an hour, so check the instructions for your pan.

    Common mistakes to avoid

    • Soaking it in the sink. Standing water is the fastest way to rust.
    • Putting it in the dishwasher. The long, wet cycle and strong detergent can strip seasoning and cause rust.
    • Letting it air-dry. Always dry it by hand and with a little heat.
    • Using too much oil. Thick layers turn sticky. Thin is better.
    • Storing it with the lid on. Trapped moisture can cause rust. If you stack pans, place a paper towel between them.

    How often should you re-season?

    Regular cooking with oil keeps seasoning in good shape, so many people rarely need a full oven re-season. Re-season when food starts sticking, the surface looks dull or patchy, or after removing rust. A quick stovetop oiling after each wash is usually enough to keep things on track.

    Frequently asked questions

    Can I use soap on cast iron?

    Yes, a small amount of mild dish soap is fine for a well-seasoned pan. Avoid soaking and harsh scrubbing pads.

    Can I cook tomatoes in cast iron?

    Short cooking is generally fine in a well-seasoned pan. Long simmering of acidic foods like tomato sauce can wear the seasoning and add a metallic taste, so a stainless or enameled pot is a better choice for those.

    Why is my cast iron sticky?

    Sticky pans usually have too much oil that did not fully bond. Heat the pan and wipe out the excess, or bake it to finish curing the layer.

    The bottom line

    Cleaning cast iron comes down to three habits: scrub it while warm, dry it fully, and finish with a thin layer of oil. Do that each time, and your skillet will only get better with age.

    Looking for more cookware help? Read our guide on how to choose a cookware set for your stove type, or browse our Cookware & Bakeware collection.

    Related articles

  • Kitchen Essentials Checklist for Your First Apartment

    Kitchen Essentials Checklist for Your First Apartment

    Disclosure: some links on souqFirst are affiliate links. If you buy through them we may earn a commission at no extra cost to you. See our Affiliate Disclosure.

    Moving into your first apartment is exciting, until you stand in an empty kitchen and realize you have nothing to cook with. The good news: you do not need a store full of gadgets. You need a small set of tools that cover about 90% of everyday cooking. This checklist is organized by what you will actually use, so you can buy in stages and keep your budget under control.

    Quick answer: the short list

    If you only buy a few things first, start with a frying pan, a saucepan with a lid, a chef’s knife, a cutting board, a spatula and a set of plates, bowls and cutlery. Everything else can wait until you know how you cook.

    1. Cookware (4 to 6 pieces)

    • Frying pan (10 to 12 inch): eggs, sandwiches, stir-fries and searing.
    • Saucepan with lid: rice, pasta, soups and sauces.
    • Large pot: boiling pasta, chili and stews.
    • Baking sheet: roasted vegetables, cookies and sheet-pan dinners.

    Buying a set can be cheaper than buying pieces one by one. Check which stove type you have first; our guide on how to choose a cookware set for your stove type explains gas, electric and induction. A simple everyday cookware set is a good starting point.

    2. Cooking tools

    • Spatula, wooden spoon, ladle and tongs
    • Whisk and a can opener
    • Vegetable peeler and a box grater
    • Colander or strainer

    One matching kitchen utensil set usually covers most of this and costs less than buying separately. Choose heat-resistant materials so you do not damage your non-stick pans.

    3. Knives and cutting boards

    You do not need a full knife block. One good chef’s knife, a small paring knife and a serrated bread knife are enough. Add two cutting boards: one for raw meat and one for vegetables and bread. Keep knives sharp, because a dull knife is harder and less safe to use.

    4. Dishes, cutlery and glasses

    A set for four people is a sensible start: plates, bowls, forks, knives, spoons and a few glasses and mugs. Look for dishwasher-safe pieces if you have a dishwasher. A neutral ceramic tableware set goes with everything and makes weeknight meals feel a little nicer.

    5. Food storage

    • A set of airtight containers for leftovers
    • Glass jars for rice, flour, pasta and snacks
    • Zip bags or reusable bags for the fridge and freezer

    Clear containers help you see what you have and reduce waste. Our airtight glass storage jars are a simple option for dry goods, and our small pantry plan shows how to arrange them.

    6. Small-space organizers

    First apartments usually mean small kitchens. A drawer organizer keeps utensils from turning into a jumble, and a shelf or bin can double your cabinet space. See the adjustable drawer organizer and pantry storage organizer, and read a calmer kitchen starts with better storage for more ideas.

    7. Cleaning and textiles

    • Dish soap, sponge and a scrub brush
    • Dish rack or a drying mat
    • Trash can with a lid
    • Kitchen towels and oven mitts

    Cotton kitchen linen towels dry dishes well and wash easily. A cotton kitchen apron is a small extra that protects your clothes when you cook.

    8. Nice to have later

    • Slow cooker or rice cooker
    • Blender
    • Kitchen scale and measuring cups
    • Thermometer for meat

    Wait on these until you notice a real need. Cook for a few weeks first and note what you wish you had.

    A simple buying plan

    1. Week 1: pan, pot, knife, board, plates, cutlery.
    2. Week 2: utensils, storage containers, towels, cleaning items.
    3. Month 2: organizers and one small appliance that matches how you cook.

    Common first-kitchen mistakes

    • Buying a huge set with pieces you will never use.
    • Skipping measurements, then finding the item does not fit your cabinet.
    • Choosing look over durability for everyday items.
    • Forgetting to check whether pans suit your stove.

    Final thoughts

    A good first kitchen is simple, functional and built over time. Start small, buy things you will use every week and add the rest as your cooking grows. Looking for more ideas? Browse our shop picks or read smart kitchen tools that save time.

    Related guides

    Browse all guides on the blog →

  • How to Choose a Cookware Set for Your Stove Type

    How to Choose a Cookware Set for Your Stove Type

    Disclosure: some links on souqFirst are affiliate links. If you buy through them we may earn a commission at no extra cost to you. See our Affiliate Disclosure.

    A cookware set looks like a simple purchase until it will not heat properly on your stove or does not fit in your cabinet. Start with three questions: what is your stove, how do you cook, and how much room do you have?

    1. Match the cookware to your stove

    • Gas: works with almost any material. Handles that stay cool and sturdy bases help with control.
    • Electric coil or smooth top: choose flat, even bases so the pan sits fully on the heating area. Warped pans heat unevenly.
    • Induction: the base must be magnetic. A simple check is to hold a magnet to the bottom of the pan. If it sticks firmly, it should work. Many sets are labeled “induction compatible.”

    2. Understand the common materials

    • Non-stick: easy for eggs and delicate food and simple to clean, but avoid very high heat and metal tools.
    • Stainless steel: durable and good for searing and sauces, but food can stick if the pan is not preheated.
    • Cast iron: holds heat very well and lasts for years, but it is heavy and needs seasoning.
    • Ceramic-coated: a lighter non-stick style. Follow the care notes to protect the coating.

    3. Decide which pieces you really use

    Large sets can include pieces you will never touch. Most households use a frying pan, a saucepan with a lid, a larger pot and perhaps a sauté pan. If you want a basic starting point, look at an everyday cookware set and count how many pieces you would actually use.

    4. Check storage and weight

    Measure your cabinet depth and decide whether pots will nest or be stacked. Stackable sets and removable handles save space. Pick up a pan if you can: a pot you find too heavy will end up unused.

    5. Do not forget the tools

    Heat-resistant utensils protect non-stick surfaces. A matching kitchen utensil set in silicone or wood is an easy way to extend the life of your pans.

    Care tips that make cookware last

    • Let pans cool before washing to avoid warping.
    • Use medium heat for most cooking.
    • Avoid stacking non-stick pans without a cloth or pad between them.
    • Read the manufacturer’s dishwasher guidance before putting anything in.

    Want more ideas to save time in the kitchen? Read smart kitchen tools that save time.

    Related guides

    Browse all guides on the blog →

  • How to Organize a Small Pantry: A Simple 5-Step Plan

    How to Organize a Small Pantry: A Simple 5-Step Plan

    Disclosure: some links on souqFirst are affiliate links. If you buy through them we may earn a commission at no extra cost to you. See our Affiliate Disclosure.

    A small pantry does not need a renovation. Most of the time it needs a little planning, a few containers that fit, and a habit of putting things back in the same place. This plan works for a narrow closet pantry, a cabinet or a few open shelves.

    Step 1: Empty it and check dates

    Take everything out and wipe the shelves. Throw away anything expired and group what is left: baking, grains and pasta, canned food, snacks, breakfast, oils and sauces. Seeing the full picture shows you what you actually use.

    Step 2: Measure before you buy anything

    Measure shelf width, depth and the height between shelves. Write the numbers on your phone. Most buying mistakes come from containers or racks that are a little too deep or too tall. If you are shopping for a pantry storage organizer, shelf depth is the number to check first.

    Step 3: Decant dry goods you open often

    Flour, rice, sugar, oats and pasta stay easier to see and easier to pour when they live in clear containers. Look for a tight lid or a gasket seal if you want food to stay fresh longer. A matching set of airtight glass storage jars also makes a shelf look tidy. Keep the original package label or write the date on the jar so you know when you opened it.

    Step 4: Zone the shelves

    • Eye level: everyday items such as breakfast, snacks and the things you grab daily.
    • Low shelves: heavy items like canned food and bulk bags.
    • High shelves: light or rarely used items such as extra paper goods or party supplies.
    • Door or side wall: spices, small packets and foil or wrap, if space allows.

    Step 5: Label and rotate

    Use simple labels so everyone in the house puts things back in the right place. When you buy new items, place them behind the older ones so the oldest food is used first. A ten-minute check once a month keeps the pantry from sliding back into clutter.

    Quick buying checklist

    • Does it fit your shelf depth with a little room to spare?
    • Is the material easy to wipe clean?
    • Are the lids easy to open with one hand?
    • Can you stack it, or will it waste vertical space?

    For drawers and cutlery, see our guide to a calmer kitchen with better storage, or browse the shop for storage picks.

    Related guides

    Browse all guides on the blog →