Home » Home Organization Ideas

Category: Home Organization Ideas

  • How to Organize Your Refrigerator (Shelf by Shelf)

    How to Organize Your Refrigerator (Shelf by Shelf)

    A well-organized refrigerator does more than look nice. It keeps food safer, helps produce last longer, and makes it easy to see what you have before you shop. Different parts of a fridge are slightly different temperatures, so where you store food actually matters. Here is a simple shelf-by-shelf plan.

    Start with the right temperature

    The U.S. Food and Drug Administration recommends keeping your refrigerator at 40°F or below and your freezer at 0°F. An inexpensive appliance thermometer is the easiest way to check, because many built-in dials don’t show an exact temperature.

    Step 1: Empty, clean and check dates

    Take everything out, throw away expired or spoiled food, and wipe the shelves and drawers with warm, soapy water. Dry them before putting food back.

    Step 2: Know your zones

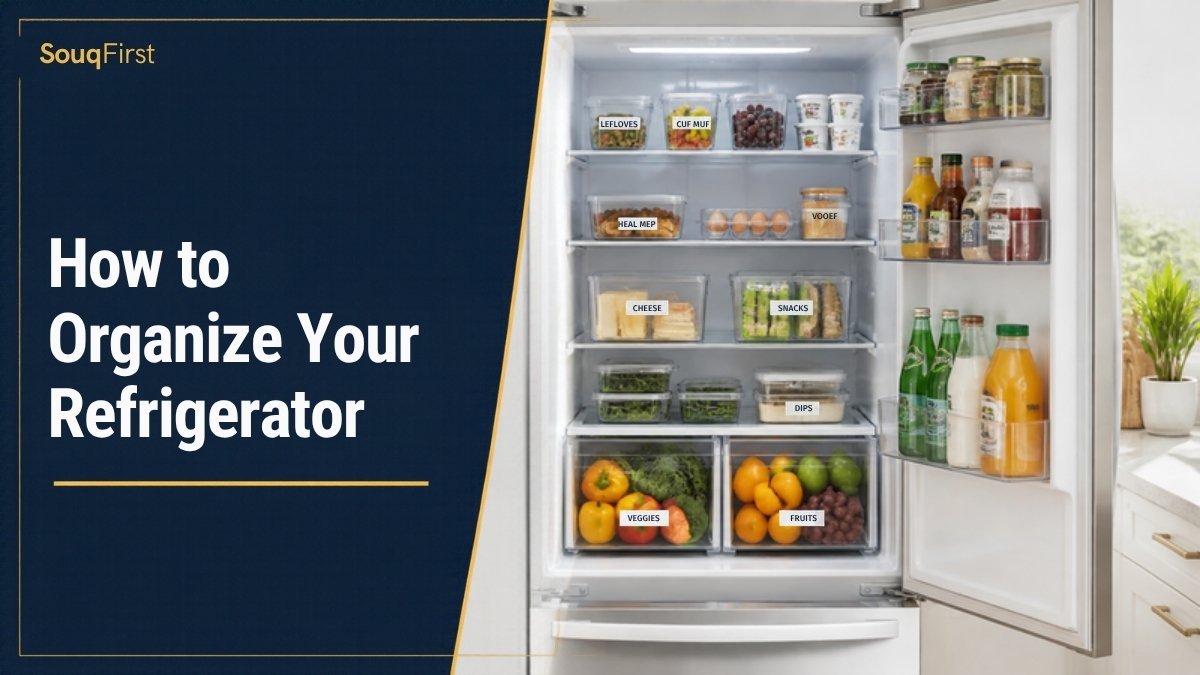
    Upper shelves: ready-to-eat foods

    Leftovers, drinks, deli items, yogurt and other foods that don’t need cooking. Keep leftovers at eye level so they get eaten.

    Lower shelves: raw meat, poultry and seafood

    Store raw meat on the bottom shelf, in a container or on a tray. If it leaks, juices can’t drip onto ready-to-eat foods below it. This is one of the most important food safety habits.

    Middle shelves: dairy and eggs

    Milk and eggs do best on an inside shelf, where the temperature is steadier than in the door.

    Crisper drawers: produce

    If your drawers have humidity controls, use a high-humidity drawer for leafy greens and vegetables that wilt, and a low-humidity drawer for fruits like apples and pears. Keeping apples away from greens also helps, because apples release ethylene gas that speeds up ripening. See how to store fruits and vegetables for more.

    Door: condiments and drinks

    The door is the warmest part of the fridge. Use it for condiments, sauces, juice and water, not milk or eggs.

    Step 3: Use clear bins and labels

    • Clear bins group small items like cheese, snacks or sauces so nothing gets lost in the back.
    • A “use first” bin for food that needs to be eaten soon helps reduce waste.
    • Turntables make it easy to reach jars in the corners.
    • Labels with dates on leftovers remove the guesswork.
    • Don’t overpack shelves; cold air needs room to circulate.

    Step 4: Keep it organized

    • First in, first out: when you unpack groceries, move older items to the front.
    • Do a quick 5-minute check before shopping so you know what you already have.
    • Wipe spills right away, especially under raw meat.
    • Eat or freeze leftovers within 3 to 4 days, following USDA guidance.

    Frequently asked questions

    Where should raw meat go in the fridge?

    On the bottom shelf, in a container or tray, so juices can’t drip onto other foods.

    Should eggs go in the fridge door?

    It’s better to keep eggs on an inside shelf, where the temperature is colder and more stable.

    What temperature should my refrigerator be?

    40°F or below, according to the FDA. The freezer should be at 0°F.

    The bottom line

    Set the right temperature, store raw meat at the bottom, keep ready-to-eat foods on top, use the drawers for produce, and save the door for condiments. Add a few clear bins and your fridge will stay organized with very little effort.

    Find clear bins and containers in our Storage & Organization collection.
    Related articles

  • How to Organize Under the Kitchen Sink

    How to Organize Under the Kitchen Sink

    The cabinet under the kitchen sink is one of the most awkward spaces in the house. Pipes run through the middle, moisture is common, and cleaning supplies tend to pile up in a jumble. With a few simple steps, it can become one of the most useful storage spots in your kitchen.

    Step 1: Empty and inspect

    Take everything out. Look for signs of a leak, such as water stains, warped wood, drips from pipe joints or a musty smell. If you find one, fix it or call a plumber before you organize. Organizing over a leak only hides the problem.

    Step 2: Clean and dry the cabinet

    Wipe the floor and walls of the cabinet and let it dry completely with the door open.

    Step 3: Add a waterproof liner

    A waterproof cabinet mat or liner protects the cabinet floor from small drips and spills. Some mats have raised edges that hold a small amount of water, which makes leaks easier to spot.

    Step 4: Edit your supplies

    Throw away empty bottles, combine duplicates where it’s safe to do so, and move products you rarely use to another cabinet. Never combine different cleaning products into one container, since some chemicals react dangerously when mixed.

    Step 5: Use bins to group items

    Group supplies by task and give each group its own bin:

    • Dish soap, sponges and dishwasher tablets
    • Surface cleaners and cloths
    • Trash bags and liners
    • Extra sponges and gloves

    Bins with handles work well because you can pull out a whole category at once. Clear bins help you see when supplies are running low.

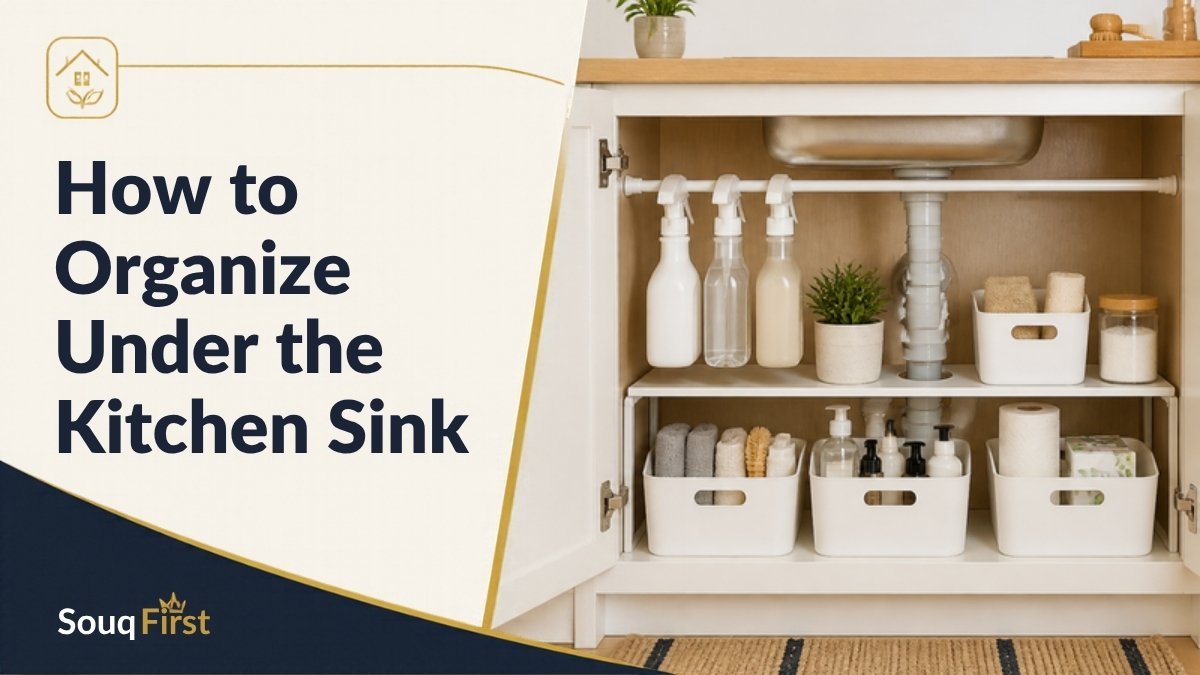
    Step 6: Hang spray bottles on a tension rod

    Install a tension rod across the top of the cabinet and hang spray bottles by their triggers. This frees up floor space and uses height that usually goes to waste.

    Step 7: Work around the pipes

    Expandable under-sink shelves are designed to fit around plumbing. Two-tier pull-out organizers also help you reach items at the back without kneeling down and digging.

    Step 8: Use the cabinet door

    An over-the-door or adhesive caddy can hold sponges, brushes or rubber gloves. Measure first to make sure the door will still close without hitting the pipes.

    Safety first if you have kids or pets

    Many cleaning products are harmful if swallowed. If small children or pets live in or visit your home, install childproof cabinet latches or move cleaning products to a higher cabinet out of reach. Keep products in their original containers with labels intact.

    Frequently asked questions

    What should not be stored under the kitchen sink?

    Avoid storing items that are damaged by moisture, such as paper goods you want to keep dry, and keep flammable products away from any heat source. If children are around, keep cleaning chemicals locked or up high.

    How do I stop under-sink cabinets from getting moldy?

    Fix leaks quickly, use a waterproof liner, and keep the area dry. Leave the door open after cleaning so the cabinet can air out.

    What is the best organizer for under the sink?

    An expandable shelf that fits around pipes, combined with a few bins and a tension rod, works for most cabinets.

    The bottom line

    Check for leaks, protect the floor, group items into bins and use the vertical space. Under-sink storage can be tidy and practical, and you will always know where the dish soap is.

    Find bins, liners and organizers in our Home Organization and Storage & Organization collections.

    Related articles

  • How to Organize Kitchen Cabinets So Everything Has a Place

    How to Organize Kitchen Cabinets So Everything Has a Place

    Messy cabinets slow down every meal. You dig for a lid, knock over a stack of bowls, and buy a second jar of cinnamon because you couldn’t find the first. The fix is not a perfect Pinterest kitchen. It is a simple system where every item has a home that makes sense. Here is a step-by-step plan that works in kitchens of any size.

    Step 1: Empty one cabinet at a time

    Trying to reorganize the whole kitchen in one afternoon is exhausting. Start with the cabinet that frustrates you most. Take everything out, wipe the shelves, and look at what you actually own.

    Step 2: Declutter before you buy anything

    Set aside items that are broken, duplicated or unused. A good question to ask is: “Have I used this in the last year?” Donate what still works. You will often find that you need fewer organizers than you thought once the extras are gone.

    Step 3: Organize by zones

    Professional organizers often recommend grouping items by where you use them. Typical kitchen zones include:

    • Cooking zone: Pots, pans, spatulas and oils near the stove.
    • Prep zone: Cutting boards, knives, mixing bowls and measuring cups near your main counter space.
    • Dish zone: Plates, glasses and mugs near the dishwasher or sink, so unloading is quick.
    • Food storage zone: Containers, foil and wraps together, ideally near where you pack leftovers.
    • Baking zone: Sheet pans, baking dishes and mixers together in one spot.

    Step 4: Put everyday items at eye level

    Keep the things you use daily between your shoulders and knees. Store seasonal or rarely used items, like holiday platters or a large roasting pan, on the highest shelves or in the back.

    Step 5: Use vertical space

    Most cabinets waste the space above short stacks of dishes. A few simple tools help:

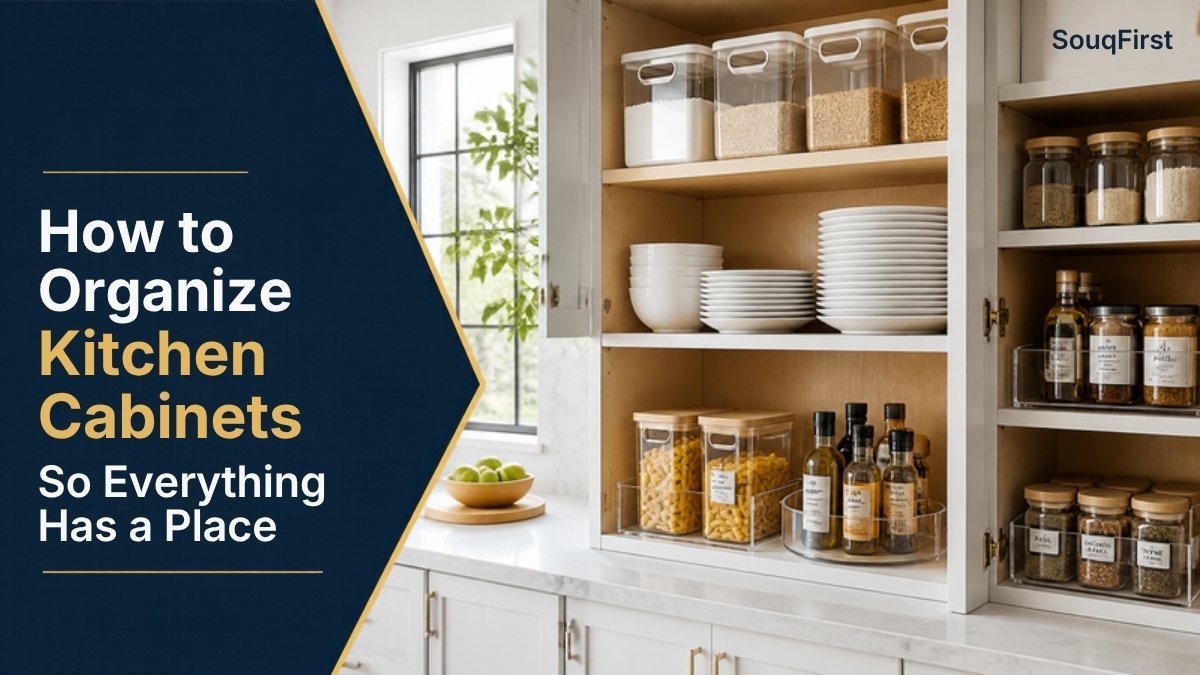
    • Shelf risers create a second level for plates, mugs or canned goods.
    • Vertical dividers store cutting boards, sheet pans and baking dishes on their sides so you can pull one out without lifting the rest.
    • Under-shelf baskets use the gap under a shelf for wraps or small items.
    • Door-mounted racks hold lids, spices or cleaning cloths. Measure the depth first so the door still closes.

    Step 6: Make deep cabinets easy to reach

    Corner and lower cabinets are where things disappear. Pull-out drawers or sliding baskets bring items to you. Turntables (lazy Susans) work well for oils, sauces and spices in corners. Clear bins with handles let you pull out a whole category at once.

    Step 7: Label and maintain

    Labels on shelf edges or bins help everyone in the house put things back in the right place. Then build a quick habit: once a month, take five minutes to reset one cabinet before clutter builds up again.

    Quick wins for small kitchens

    • Nest mixing bowls and measuring cups.
    • Store lids vertically in a rack or file organizer.
    • Keep only the pots and pans you use regularly in the main cabinet.
    • Use the inside of cabinet doors for lightweight items.

    Frequently asked questions

    Where should plates go in the kitchen?

    Near the dishwasher or sink is usually most practical, because it makes unloading faster.

    How do I organize pots and pans?

    Store them near the stove. Use a vertical rack or pan organizer so you are not lifting a heavy stack to reach the one at the bottom.

    Should I use clear containers?

    Clear bins and canisters make it easy to see what you have, which helps prevent duplicate buys. Choose sizes that fit your shelves before buying a whole set.

    The bottom line

    Organized cabinets come from three things: owning less, grouping items by where you use them, and making the back and top of each cabinet easy to reach. Start with one cabinet this week.

    Need storage to get started? Browse our Storage & Organization collection.
    Related articles

  • A Calmer Kitchen Starts with Better Storage

    A Calmer Kitchen Starts with Better Storage

    Disclosure: some links on souqFirst are affiliate links. If you buy through them we may earn a commission at no extra cost to you. See our Affiliate Disclosure.

    A cluttered kitchen makes every task take longer. The good news: you do not need a full renovation to fix it. A few simple systems can make your kitchen feel calmer in a single weekend.

    1. Start with a quick clear-out

    Take everything out of one cabinet or drawer at a time. Toss expired food, donate duplicates, and only put back what you actually use.

    2. Decant pantry staples into clear jars

    Rice, pasta, oats, beans and snacks look tidier and stay fresher in airtight, see-through containers. You can tell at a glance when you are running low.

    3. Group items by how you use them

    • Baking supplies together on one shelf
    • Everyday spices within reach of the stove
    • Lunch-prep items near the fridge

    4. Use drawer dividers and risers

    Dividers stop utensils from turning into a tangle, and shelf risers double the usable space inside cabinets.

    5. Label everything

    Labels help the whole household put things back in the right place, which is the real secret to a kitchen that stays organized.

    Ready to start? Our 5-step small pantry plan shows how, and you can browse drawer organizers, pantry organizers and glass storage jars in the shop.

    Related guides

    Browse all guides on the blog →